You need a fence contractors who delivers the right mix of quality, compliance, and value for your property. Choose a fencing contractor who communicates clearly, provides a written estimate and timeline, and can demonstrate proper licensing, insurance, and local code knowledge—this is the fastest way to avoid delays, extra costs, and safety issues.
This article walks you through how to evaluate contractors, compare materials and installation methods, and plan for ongoing maintenance so your investment lasts. Expect practical tips on vetting bids, understanding common warranties, and spotting professional workmanship so you can decide with confidence.
Selecting Fence Contractors
You should focus on verified credentials, clear written estimates, and contractors who specialize in the material and permit requirements for your property. Prioritize firms that provide warranties, a detailed timeline, and clear communication about site access and cleanup.
Key Qualifications to Look For
Check for a valid business license and proof of insurance (liability and workers’ compensation). Ask for the contractor’s registration number if local bylaws require it. Confirm the company carries at least $1–2 million in general liability insurance if you have a busy or high-value site.
Request written estimates that list labor, materials (brand and grade), post spacing, footing depth, and disposal fees. Look for standard warranties: at minimum one year on workmanship and manufacturer warranties on materials. Verify that the contractor pulls required permits or shows experience working with your municipality’s permitting process.
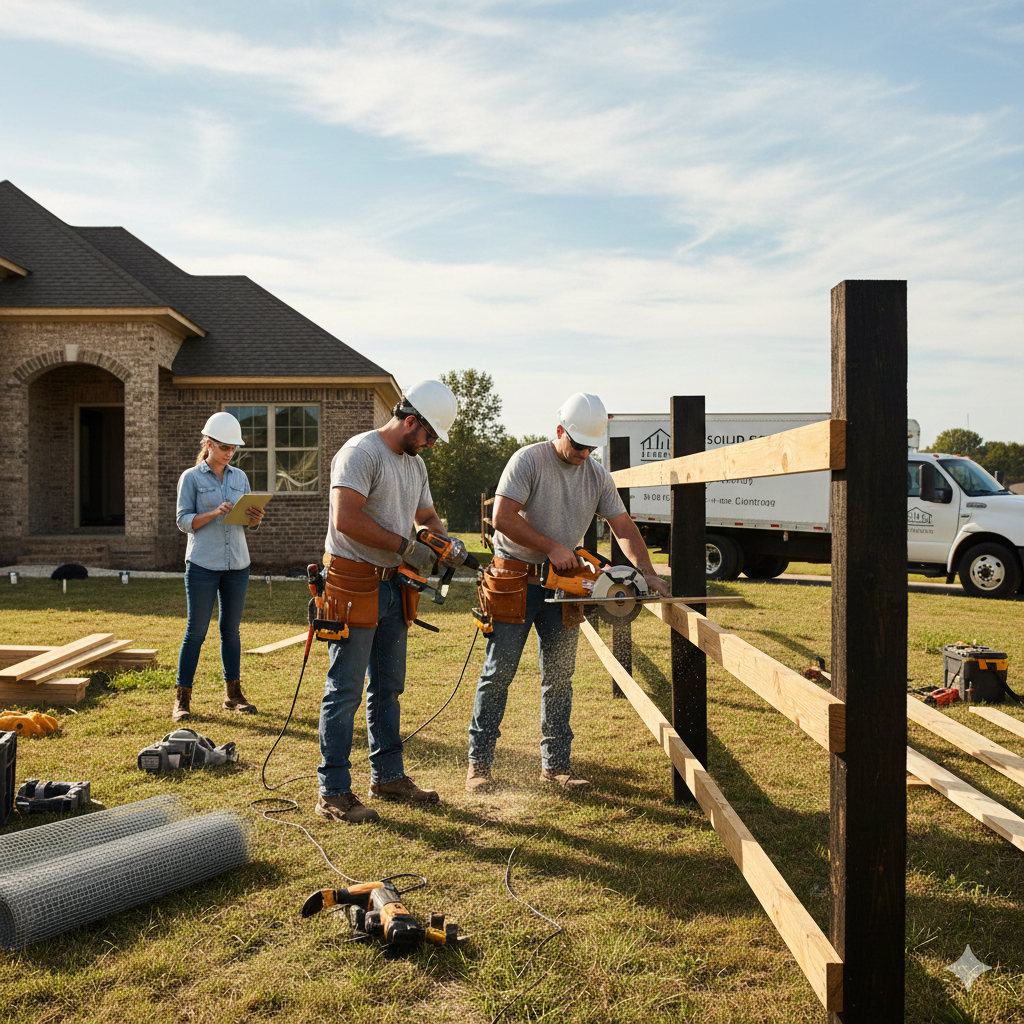
Types of Fencing Services Offered
Identify services that match your project: new installations, full removals and replacements, repairs, gate installation (manual or automated), and temporary construction/site fencing. For residential work, confirm experience with wood, vinyl, aluminum, and composite fences. For commercial or security projects, check expertise in chain-link, steel palisade, and access-control systems.
Ask whether they provide design consultation, material samples, post-location staking, and concrete footings versus driven posts. Confirm if they handle grading adjustments, drainage needs, and locate utility lines before digging. If you need permits or HOA approvals, verify they will prepare and submit drawings.
Evaluating Contractor Experience
Request references and look for recent, local projects similar in scope to yours. Visit a completed job when possible or review time-stamped photos to assess finish quality, post alignment, and cleanup. Pay attention to repeat-client work and longevity in your area; firms familiar with local soil types, freeze-thaw cycles, and municipal codes reduce risk.
Ask about crew composition: licensed foreperson on site, subcontractor use, and estimated crew size. Confirm typical project timeline and how they handle unexpected issues like rot, hidden grade changes, or buried obstructions. Finally, check online reviews for recurring complaints about scheduling, change-order costs, or warranty follow-through.
Fence Installation and Maintenance
You’ll learn how to plan the layout, prepare the site, what happens during installation, and how to keep the fence performing and looking good over time. Focus on measurements, materials, permits, correct installation steps, and a simple maintenance schedule to protect your investment.
Project Planning and Site Preparation
Start by marking exact property lines and confirming easements with a copy of your survey; call 811 to locate utilities at least three business days before digging. Decide materials—pressure-treated wood, vinyl, aluminum, chain-link, or wrought iron—based on budget, lifespan, and local weather exposure.
Get local permits early; many Houston-area jurisdictions require a permit and setback compliance. Measure perimeter and calculate linear feet, number of posts, gate openings, and hardware needs. Plan drainage changes and grade breaks so water won’t pool at the fence base.
Clear vegetation, remove old posts and debris, and establish a level reference line for post heights. Consider neighbor agreements for shared fences and write them down. Prepare access for equipment and schedule installation for dry weather when soil holds post holes.
Installation Process Overview
Install layout stakes and string lines to set fence alignment and post spacing. Dig post holes to required depth—typically 30–36 inches or below frost line—and use a level and temporary bracing for vertical alignment. Concrete backfill or compacted gravel provides stable anchoring depending on material and local codes.
Set posts plumb, then install rails or panels, ensuring consistent spacing and top lines. For gates, use heavier posts and proper hinges; test swing clearance and latch alignment before final backfill. Attach hardware and finish treatments—stain, paint, or powder coat—while hardware is easily accessible.
Inspect for uniform height, secure fasteners, and even spacing. Remove excess concrete forms and restore topsoil or sod around posts. Keep a photographic record of final positions and any areas where you agreed to alter drainage or grade.
Ongoing Maintenance and Repairs
Create a seasonal checklist: inspect posts and rails every spring and fall for rot, rust, or loose hardware. Tighten or replace fasteners, reset any leaning posts by re-digging and anchoring, and touch up coatings to prevent corrosion or UV damage. For wood, re-stain or seal every 2–4 years as needed.
Address small repairs quickly—replace single pickets, section panels, or a broken hinge—so minor issues don’t spread. For metal fences, remove rust with a wire brush and apply rust-inhibiting primer before repainting. For vinyl, clean with mild detergent and rinse; replace cracked sections rather than patching.
Keep vegetation trimmed away from the fence to prevent moisture retention and insect access. Maintain gate hardware by lubricating hinges and adjusting latches seasonally. Document repairs, part numbers, and contractor contacts so you can restore the fence to original condition when necessary.